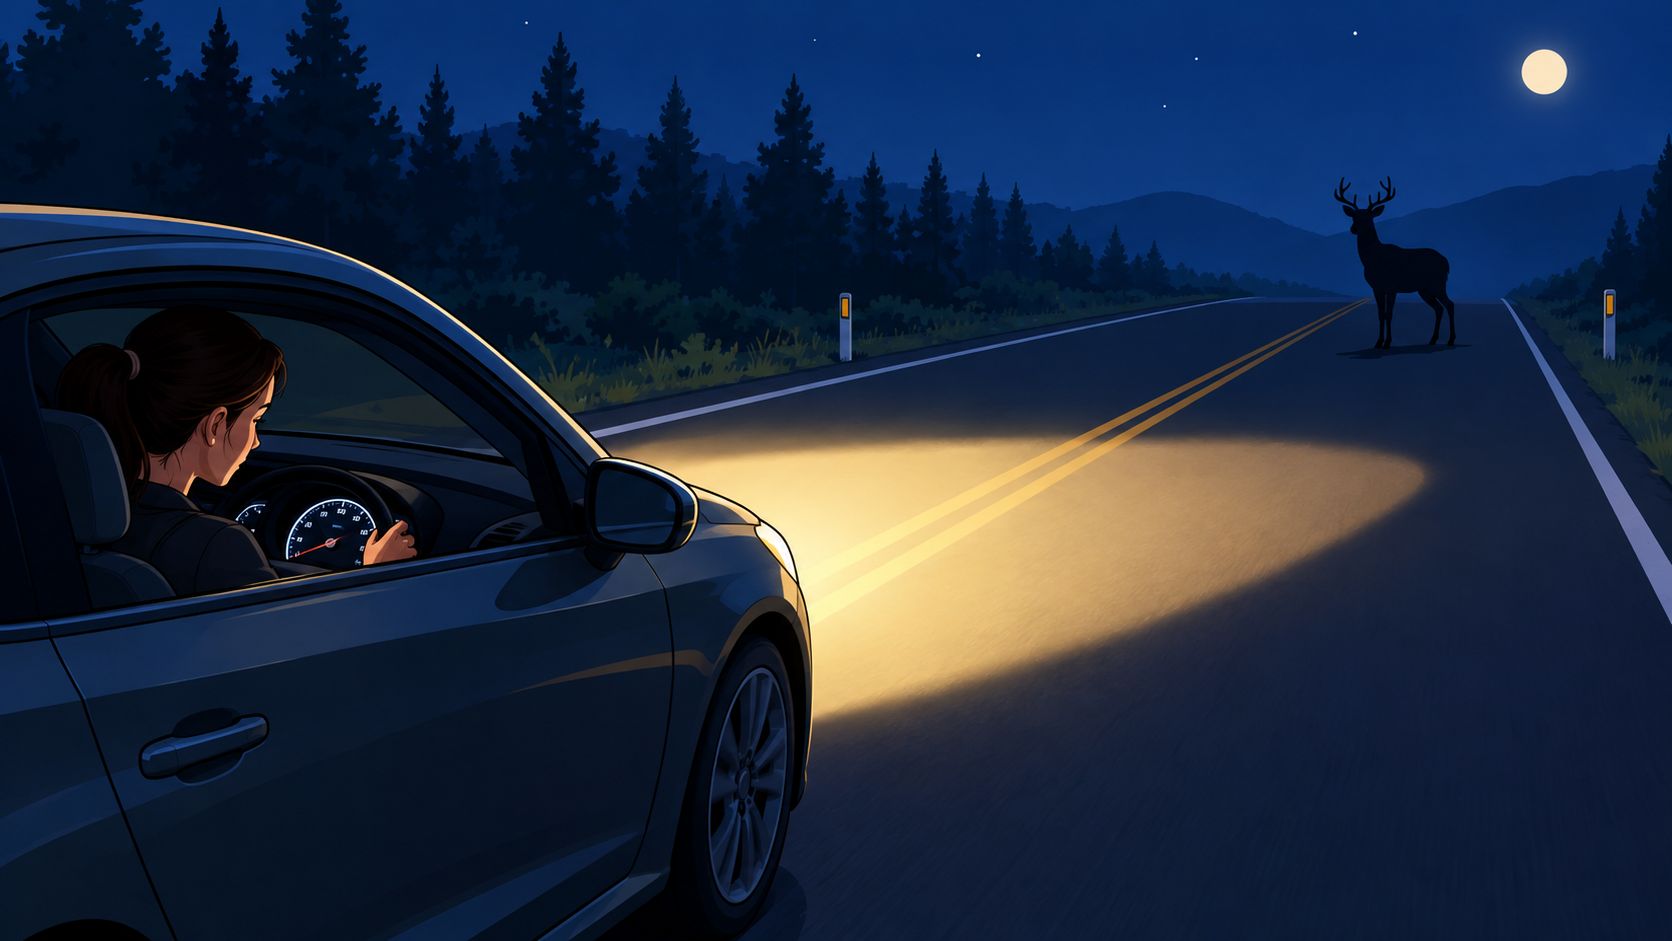
You’re on a road you know well, it’s past 10 p.m., and you’re doing the posted limit because there’s no traffic and the pavement looks dry. Then something dark takes shape at the edge of your light, too close for comfort. That moment is what learning to avoid overdriving your headlights is meant to prevent.
The Night You Almost Missed What Your Headlights Couldn’t Show
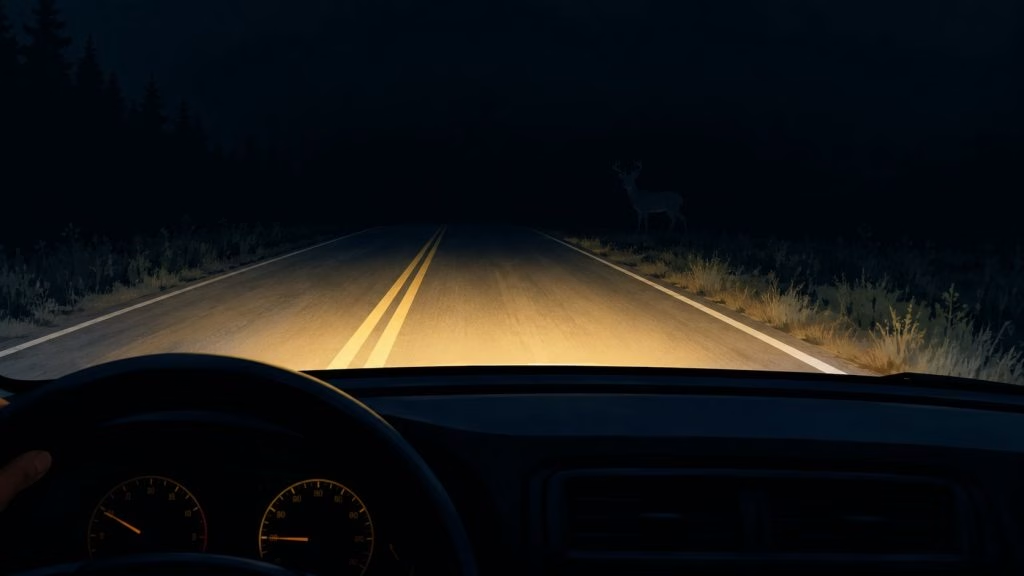
You know this two-lane road by daylight. You know where it bends, where the shoulder drops, and where deer cross near the tree line. At night, that familiarity can work against you, because you’re driving from memory while your eyes only get a short strip of lit pavement.
High beams are on. The road looks empty. Then a deer steps in from the right, or a stalled car with no lights shows up just past a hill crest, and you’re braking hard while judging whether the shoulder is clear. You didn’t miss it because you weren’t looking. You almost missed it because it wasn’t visible early enough for your speed.
What Overdriving Your Headlights Means
Overdriving your headlights means traveling faster than the illuminated roadway allows you to stop safely. Ontario’s official driver handbook definition describes it as having a stopping distance farther than the distance visible through the headlights.
That definition matters on unlit roads and in rain, snow, or fog. The hazard doesn’t need to be moving toward you. It only needs to appear beyond your available stopping space.
Practical rule: Your speed is only safe when your entire stopping distance fits inside the visible road ahead.
Students often tell me they weren’t speeding. That’s not the test. A posted limit doesn’t measure your beam reach, your reaction time, or your tires on that surface tonight.
Treat headlight reach as a measurable safety ceiling, not a comfort feature. If the ceiling drops because of a curve, glare, or weather, your speed has to drop with it.
Our broader night driving tips for safer trips after dark build on that same rule. Scan wide, manage glare, and never let familiarity with a route substitute for what you can verify in the beam right now.
That single rule, stop within what you can see, is the model to carry through every decision that follows. If you can’t prove you can stop inside the lit area, you’re guessing. Night driving punishes guessing quickly.
The Math of Stopping Distance at Night
Stopping isn’t one action. It’s three distances added together while your car keeps moving at full speed for part of them. That’s why good intentions don’t shorten the math.
First comes perception distance. You travel while your eyes detect something and your brain decides it’s a hazard, not a shadow or a mailbox reflector. Low contrast targets in dark clothing or a non-reflective object take longer to resolve than a lit sign.
From Seeing to Stopping
Second is reaction distance. You’ve decided to brake, but your foot hasn’t applied meaningful pressure yet. Third is braking distance, where tires, brakes, load, and pavement finally convert speed into heat and bring you to a stop.
At 55 mph, a driver needs approximately 500 feet of roadway to perceive an obstacle, react, and stop completely, while common halogen headlights on low beam illuminate only about 300 feet, according to AAA testing of headlight performance and stopping distance. That leaves roughly 200 feet of travel beyond what you can see.
You’re not short by a car length. You’re short by a distance you cover before a hazard even becomes visible. That’s the gap you have to close by slowing down, because you can’t lengthen low beams by wishing.
AAA also noted halogen headlights were on more than 80% of vehicles in its study. Newer systems help, but they don’t erase the gap at highway pace, as the comparison below shows.
Low Beam Reach Versus Safe Speed on Unlit Roads
| Headlight Type | Low Beam Reach (ft) | Speed Where Stopping Exceeds Visibility |
|---|---|---|
| Halogen reflector | 300 feet | Above about 39 mph |
| Halogen projector or HID | 400 feet | Above about 45 mph |
| LED | 450 feet | Above about 52 mph |
Those thresholds come from AAA analysis using AASHTO stopping distance guidelines, which matched each system’s visibility for a non-reflective object against stopping needs. Read the LED line carefully. Even at 450 feet, you’re past the safe point above about 52 mph on an unlit road.
If you want the underlying arithmetic worked step by step, see how to calculate stopping distance before you drive. Run your own usual night speed through it once. Most drivers are surprised by how much road disappears during perception and reaction alone.
- Wet pavement stretches braking distance: Your beam reach stays the same while stopping needs grow.
- Worn tires do the same: Less grip means you need more of the visible road just to stop.
- Hills and curves shrink sight distance: The beam points into a bank or over a crest, not down the travel path.
Québec’s guidance puts typical low beam illumination at approximately 45 to 70 to 75 metres, or about 148 to 246 feet, in Québec road safety guidance for driving at night. Different fleets and aim conditions produce different figures. The lesson doesn’t change. Low beams are short.
Legal speed and safe speed aren’t the same thing. At night, safe speed is set by light, surface, and your car tonight. The posted number was never a promise that those three line up.
Running the Visibility-vs-Stopping Check Every Time
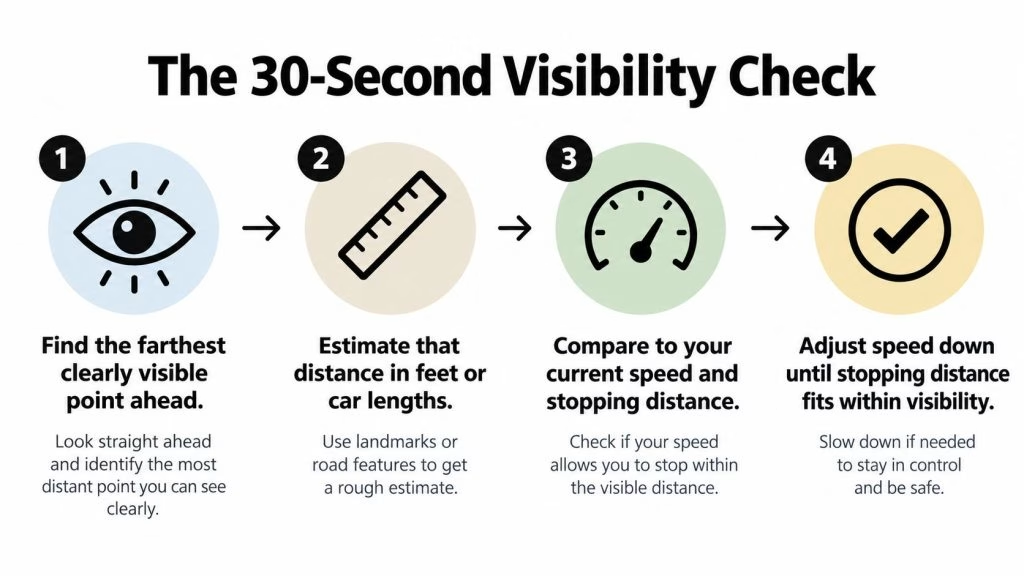
You don’t need a calculator in the car. You need a short loop you repeat until it’s automatic, especially before curves and crests where the visible road shortens fast. Run it in under 30 seconds, then run it again when anything changes.
The Four Step Check
1. Pick the farthest clearly visible point. Not where light technically falls. The farthest point where you could identify a person, animal, or stalled car in time to act. If you’re squinting, that point is closer than you think.
2. Estimate that distance. Use feet if you can, or car lengths and road features you pass. Then ask whether you could stop before that point from your current speed, with margin left over.
3. Compare against conditions, not hope. Add room for reaction time, wet pavement, worn tires, and a pedestrian in dark clothing. If any of those are present, your usable margin is already smaller.
4. Ease off until stopping fits inside visibility. Don’t wait for a reason to brake hard. Reduce speed early, increase following distance, and reassess as the next curve, hill, or oncoming car changes what you can see.
NHTSA sponsored research reports typical low beam patterns often don’t provide enough visibility to detect low reflectance targets in time to stop above approximately 30 to 40 mph, summarized in this Washington review of daytime and nighttime visibility research. That range surprises students. It shouldn’t, once you’ve seen the reach numbers.
That same research found oncoming glare can reduce detection distance by 15 to 60 m, with average visibility reductions of about 23 to 24 m in controlled testing. In plain terms, an approaching car can temporarily steal a large chunk of your safety ceiling. Slow before it passes, not after your vision recovers.
Prompts That Keep the Loop Honest
- Use the right edge line: When glare hits, shift focus toward the right edge line while holding lane position. Don’t stare into approaching headlights.
- Choose beams by traffic: Use low beams whenever another vehicle is approaching or ahead of you. Reserve high beams for unlit roads where they won’t cause glare.
- Recheck at every change: Rain starts, a crest approaches, roadside clutter increases. Your previous speed judgment has expired.
If hazards seem to pop into view instead of developing gradually, you’re already too fast for your visible distance.
I watch for that pop-in effect during lessons. When objects materialize suddenly, students tense up and brake late. When they slow early and narrate the farthest visible point out loud, their braking gets calmer and earlier. Try narrating it on your next night drive. It keeps the check conscious until it becomes habit.
High Beams, Low Beams, and Glare
Beam choice changes your ceiling, but it doesn’t repeal it. Use the most illumination you can legally use without impairing others, then set speed for the beam you’re on, not the one you were using a minute ago.
The split view below shows why dimming is not just courtesy. A driver facing high beams loses usable vision at the exact moment both cars are closing on each other.
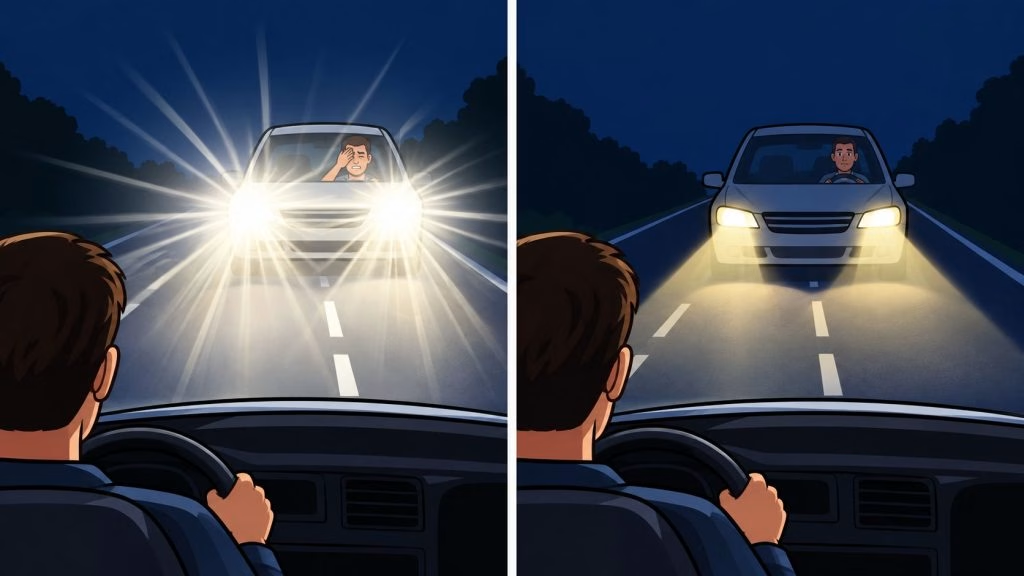
On roads without overhead lighting, high beams improved sight distance by an average of 28% in AAA testing, reported above. That’s meaningful extra road. It also disappears the moment you must dim for approaching or preceding traffic, which is why dimming should trigger a speed check at the same time.
Québec requires switching to low beams at least 150 metres from an approaching vehicle and at least 150 metres when following another vehicle, per the guidance cited earlier. Your local rule may differ in wording. The defensive habit is the same everywhere. Dim early enough that the other driver never has to recover from your light.
Glare Is a Separate Problem From Brightness
A road can look bright near your hood while detection distance far ahead is collapsing. NHTSA’s review found an oncoming headlamp intensity of 1,000 candela can reduce visibility distance by one third and 7,000 candela can reduce it by two thirds, in NHTSA nighttime glare and driving performance research. That’s why you can’t judge safety by how bright the pavement looks.
Glare was cited in only about 1 to 2 of every 1,000 nighttime crashes, while inadequate visibility is a much larger concern, according to an IIHS summary of headlight research areas. Don’t read that as permission to tolerate glare. Read it as a ranking. Not seeing far enough is the bigger killer, and glare makes not seeing worse.
Watch the short demonstration below with that distinction in mind. Notice how quickly the usable view changes when beam aim and oncoming light change.
Adaptive driving beam systems can reduce light directed toward occupied areas while illuminating unoccupied roadway, including pedestrians, animals, and roadside objects. That’s a real advance. It isn’t infallible in complex curves, rain, sensor obstruction, or poor aim, and automatic high beams don’t always react as quickly as the situation needs.
For the full rules on switching and following distance, review when to use high beam and low beam headlights. Then apply the simpler test in the car. If your beams just went low, your speed decision just changed too.
Preparing the Car So Your Headlights Actually Work
Headlight performance isn’t a preference. It’s a measurable part of your stopping system, and you can improve it before you turn the key. Dirty, clouded, or misaimed lamps lower your ceiling while your speed stays where it was.
A Pre Drive Check That Buys Real Margin
- Clean both lenses: Road film and oxidation scatter light that should be reaching hazards ahead.
- Confirm correct aim: Aim decides where the usable beam lands. Brightness pointed at the sky or the ditch doesn’t help you stop.
- Inspect for clouding or moisture: Either one signals reduced output or a sealing problem worth fixing before a long night drive.
- Verify low and high beams both work: Check before you need the missing mode on an unlit road.
- Check tire pressure and tread: Braking capability determines whether your visible distance is enough.
When lenses have yellowed beyond what washing fixes, restoring the surface can recover clarity that cleaning alone won’t. That’s the practical value behind services such as GP Mobile’s headlight restoration from GP Mobile Car Wash & Detail, which addresses the clouded lens itself rather than masking it with a brighter bulb.
The payoff from better lamps is measurable. In a 2024 crash analysis study, median right side low beam visibility was about 68.2 m for poor rated headlights versus 103.1 m for good rated headlights, reported in this 2024 study of headlight ratings and nighttime pedestrian crashes. Under its modeled conditions, typical drivers had enough time to detect and avoid 46.2% of nighttime pedestrian crashes with poor rated headlights compared with 70.1% with good rated headlights, and high beams theoretically raised coverage above 90%.
Those are model based figures, not a guarantee for your car or your road. They do show why I push students to fix the hardware first. Extra visible metres are extra seconds to decide, and seconds are what night braking runs on.
Two Upgrades That Often Backfire
Incompatible aftermarket bulbs are the classic false fix. They can create glare for others without improving aim or the shaped cutoff your housing was designed around. You feel brighter. You don’t necessarily see a low contrast hazard sooner.
Automatic high beams are the subtler trap. Use them, but monitor them. If the system is slow to dip for a car ahead or slow to restore light after it passes, take over manually and adjust speed for what you’re seeing.
Fold these checks into your routine Florida vehicle maintenance between services and they stop feeling like extra work. Five minutes in the driveway can buy more night margin than any last second braking technique. Prep is speed control you do while parked.
Putting It All Together and Answering the Edge Cases
On a real night road, there’s no separate moment for math, beam rules, and car prep. There’s one continuous loop. See, compare, adjust, and see again.
Your prep sets the best ceiling your car can offer. And your beam choice sets the ceiling you’re using right now. Also your speed either fits inside that ceiling or it doesn’t, and conditions keep moving the ceiling while you drive.
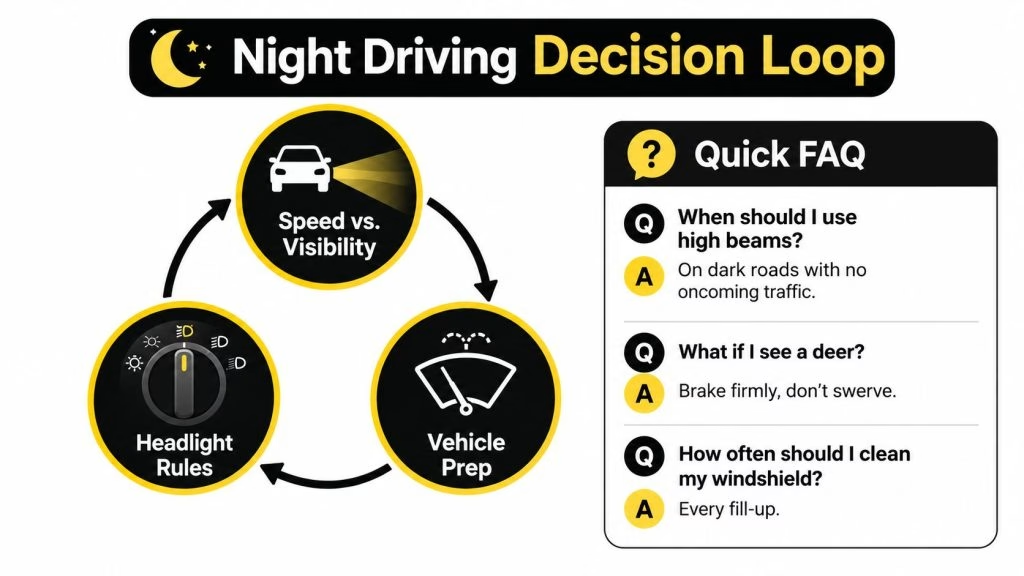
The crash data support treating that loop seriously. In an IIHS analysis of approximately 44,000 police reported single vehicle crashes in darkness across 11 U.S. states, vehicles with headlights rated good had a 19% lower nighttime single vehicle crash rate than vehicles with poor headlights, according to IIHS research linking good headlight ratings to lower crash rates. They also had about 29% fewer crashes involving driver injury and approximately one quarter fewer tow away and pedestrian crashes. Tested low beam illumination in that work ranged from 125 feet to 460 feet, which is an enormous spread between cars on the same road.
Better headlights lower risk. They don’t remove your job. You still choose the speed that fits tonight’s visibility.
Quick FAQ
How can you tell you’re overdriving when conditions change, not just speed? Normal headlights typically illuminate only about 250 feet, while high beams reach about 500 feet, noted in National Safety Council guidance on driving at night. If rain, a crest, dirty lenses, a heavy load, or worn brakes shrink your margin, ask the scenario question directly. Also If you can see only 250 feet, can you stop within 250 feet? And If not, slow before the curve, not in it.
Do brighter or adaptive headlights remove the need to slow down? No. They extend what you can detect, but system limits, poor aiming, rain, and unexpected hazards can still leave stopping distance longer than visible distance. Use the greatest legally permitted illumination that doesn’t impair others, scan continuously, and let visibility set speed.
What’s the difference between legal speed and safe speed? Legal speed is the posted maximum. Safe speed is the speed where perception, reaction, and braking all fit inside what your headlights reveal on this surface tonight. When those conflict, safe speed wins.
Structured practice makes this loop stick faster than reading alone. BDISchool covers night visibility, following distance, and defensive speed choice inside its Florida driver improvement curriculum, so the habits here connect directly to the rules you’ll be tested and ticketed on.
Run the loop on your next drive home. Name the farthest visible point, check your speed against it, and adjust before the road forces the decision for you.
If night driving still feels like guesswork, BDISchool’s Florida approved online courses turn the visibility versus stopping check, beam rules, and defensive following distance into step by step lessons you can complete at your own pace, whether you’re dismissing points, meeting a court requirement, or refreshing rusty habits. Visit BDISchool to pick the course that fits your situation and start building a night driving routine you can trust.